Retractable Banners That Actually Get Noticed Without Breaking Your Budget
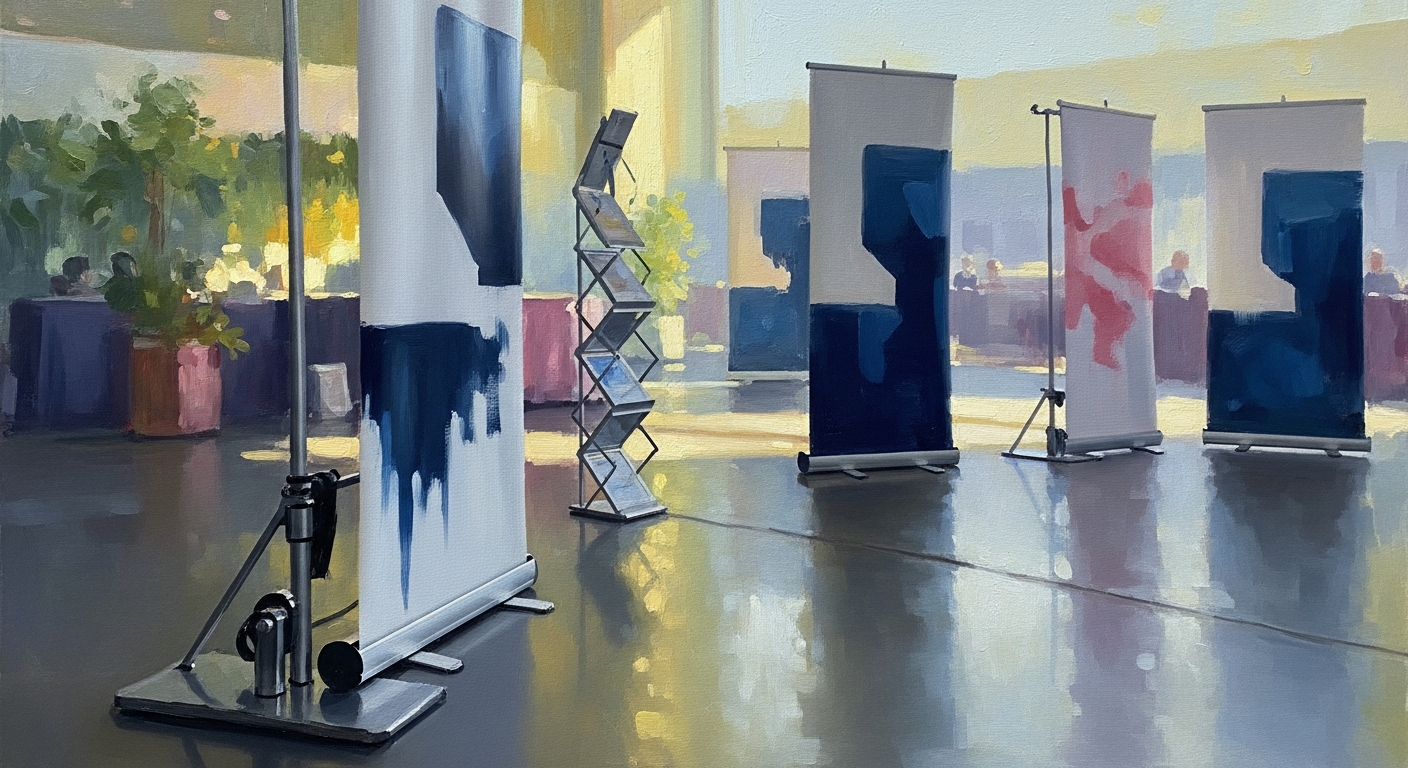
Picture this: You’re walking a crowded trade show floor past rows of identical retractable banners, each one screaming for attention while somehow blending into visual wallpaper. Someone spent real money on those displays. Quality stands run $250-$ 600 per unit, and most booths require multiple displays.
Most retractable displays fail for a simple reason: Nobody thinks beyond “portable and convenient.” They grab the cheapest stand (often $150-200 at office supply stores), throw their logo on a white background with stock photos, and wonder why nobody stops. Budget mechanisms often show wear around 18-25 setups. Graphics look washed out under harsh convention centre lights. The whole display screams “rush job.”
This guide shows you which banner type best matches your actual usage (with failure patterns from over 30 years of manufacturing experience), how to design graphics that work effectively from typical viewing distances, and how to deploy displays that deliver value over time.
Important Disclaimer: Material prices, printing costs, and display technology change frequently. All pricing represents approximate 2025 market ranges in North America and should be verified with current suppliers. Individual results vary significantly based on usage patterns, storage conditions, and care practices.
Pop49’s in-house manufacturing (large format printing to CNC machining) means these recommendations come from actually producing thousands of displays since 1989, not just reselling imports.
Matching Banner Types to Your Real Usage Pattern
Stand selection should match realistic usage frequency, not optimistic estimates.
Standard Duty for Quarterly Use
Standard stands (typically $250-$ 380, though prices vary by supplier) are suitable for occasional use, such as quarterly shows or annual conferences. Mechanisms are rated for 30-50 cycles under careful handling, although their actual lifespan varies based on the conditions.
Common sizes: 33×79 inches (industry standard), 24×72 inches (compact), 47×79 inches (wide format). Total weight ranges from 10 to 14 pounds. The 33-inch width fits standard airline luggage restrictions. The 79-inch height puts messaging at average eye level (5’3″-5’9″) for viewers standing 10-15 feet away.
Quality mechanisms use stainless steel springs, maintaining 90%+ tension after 100 setups. Budget mechanisms may lose significant tension after 25-35 cycles, resulting in a saggy appearance that makes your investment appear unprofessional.
Heavy Duty for Weekly Use
Heavy-duty stands (often priced at $450-680) are suitable for teams that perform frequent setups. Reinforced mechanisms are rated for 150 or more cycles. These use thicker-gauge springs with more coils, as well as better materials throughout (pole connections, graphic attachments, and foot stands).
Cost per cycle comparison: The standard at $320, delivering 40 uses, costs $8 per use. A heavy-duty model at $550 delivers 150 uses, costing $3.67 per use. For frequent exhibitors, heavy-duty actually costs less than half per event while eliminating emergency replacements.
Example scenario (illustration only): A marketing team that performs 52 shows annually might replace standard stands every 8-10 months, whereas heavy-duty stands last 2-3 years or more. Over three years, this could mean multiple standard replacements ($1,280 total) versus one heavy-duty purchase ($550 total). Actual costs vary significantly based on real-world conditions.
Important: These examples are for illustration only and should not be interpreted as guaranteed performance. Individual results vary significantly.
Double-Sided for Multi-Direction Traffic
Double-sided stands (typically $420-580) make sense for centre-aisle booths with traffic from both directions, retail displays away from walls, or conference registration areas. You’re paying 40-60% more than single-sided equivalents.
Value depends entirely on traffic patterns. A centre-aisle booth with four-directional traffic makes double-sided signage worthwhile. A perimeter booth with a single approach offers little benefit, as the back faces a wall.
Backlit for Maximum Visibility
Backlit stands (adding $ 180-$280+ to the base cost) integrate LED edge lighting. This only works effectively with fabric materials. Vinyl blocks 98-100% of light. Fabric allows 35-55% transmission, creating even illumination across graphics.
In trade show environments with typical ambient lighting (800-1200 lux), backlit displays create additional illumination that makes displays visible from greater distances, though the exact improvement varies by conditions.
Choosing Materials for Your Specific Environment
Material selection drives both performance and cost. Match to the actual environment rather than over- or underspecifying.
Vinyl for Indoor Applications
Vinyl handles most indoor situations. It blocks light completely, cleans easily with isopropyl alcohol (takes 90-120 seconds), and maintains colour through 60-80 setups when stored properly. Standard banners weigh 6-9 pounds.
The material is PVC with a smooth print side and textured backing. Quality vinyl uses plasticisers that don’t migrate over time, preventing the stiff, crackly feeling that budget vinyl develops after 12-18 months. Temperature tolerance covers virtually any indoor environment.
Cleaning frequency varies: high-traffic retail displays benefit from weekly cleaning, moderate trade show use every 2-3 uses, and occasional events before storage after each use.
Poly Film for Weather Resistance
Outdoor events need different characteristics. Vinyl absorbs enough moisture (0.2-0.4% by weight) to cause visible warping during multi-day outdoor events. On 80-inch banners, this creates noticeable buckling.
Poly film offers better water resistance through hydrophobic surface treatment. Water beads up and rolls off. Set up Friday, get Saturday rain, Monday looks identical. No absorption, no warping.
Budget poly film often costs 15-25% less than vinyl (though prices vary), but shows less premium appearance indoors and potentially scratches more easily.
Fabric for Travel and Premium Appearance
Fabric weighs 30-40% less than vinyl. Standard 33×79 vinyl weighs 6.5-8 pounds versus 4-5 pounds for fabric. This impacts shipping costs significantly. Shipping carriers tier by weight. Fabric keeps you in lower brackets. Ship ten banners monthly, and the weight difference compounds.
Shipping Cost Disclaimer: Costs vary significantly by carrier, origin, destination, and rates. Examples are approximate and should be verified.
The fabric premium (often $100-130 more per banner) may be offset by reduced logistics costs for frequent shippers. But fabric’s real advantage is wrinkle resistance. Vinyl shows permanent creases from improper rolling. Fabric tolerates imperfect packing. Use a garment steamer for 45-60 seconds, and the wrinkles disappear.
Understanding Mechanism Protection
Spring mechanisms protect graphic investment (typically $150-400 for printing). When banners retract into aluminium cases, the material stays protected from scratches, tears, and environmental damage.
Tensioned systems (premium option adding $80-150) allow adjustment to compensate for material stretch over time. Materials naturally stretch slightly with each cycle. After 40-50 cycles, accumulated stretch may create 2-3 inches of sag on 80-inch banners. Tensioned systems adjust to restore a taut appearance. Without adjustment, graphic replacement might become necessary around 45-60 setups from stretch damage.
Budget mechanisms follow predictable wear: minor tension loss around 18-25 setups (slight wrinkles), obvious by 25-35 cycles (visible from 10 feet), significant degradation by 35-45 setups (won’t stay extended without adjustment), catastrophic failure at 38-42 (loud snap or complete degradation).
Disclaimer: Lifespan estimates are based on Pop49’s manufacturing experience, assuming proper care. Individual results vary significantly based on usage frequency, handling, environmental conditions, and mechanism quality. No guarantees regarding specific longevity.
Designing Graphics That Work From Distance
Most banners fail a simple test. Stand 15-20 feet away (typical trade show viewing distance) and evaluate whether the core message is immediately clear. If it’s not obvious within three seconds, the banner may not be performing optimally.
Understanding Natural Scanning Patterns
People scan displays in predictable patterns. F-pattern for text-heavy content: across top, down left side with periodic right scanning. Z-pattern for image-heavy content: top left to top right, diagonal to bottom left, across to bottom right.
Messages placed outside natural scanning patterns register with roughly 15-25% of viewers. Messages in optimal positions register with roughly 75-85%. That’s a 3-4x effectiveness difference purely from placement.
F-pattern optimal placement: primary headline top 20% of display, company logo top left corner, key benefits left 30% aligned with vertical eye movement. Z-pattern optimal placement: primary message top edge, visual interest in the centre creating a diagonal sight line, call-to-action bottom right where eyes finish.
Font Sizes and Typography
For 15-20 feet viewing: headlines around 96-point or larger (1.3+ inches tall), supporting text around 48-point (0.67 inches), body text around 36-point (0.5 inches). Smaller text may not be readable. These measurements are based on visual angle calculations, ensuring readability at a distance.
Use sans-serif fonts (Helvetica, Futura, Gotham, Montserrat). Serif fonts lose readability beyond 10-15 feet as decorative elements become less distinct. Font weight matters: regular (400) is minimum, medium or bold (500-700) is better for all sizes. Thin weights (200-300) often disappear at a distance.
Avoid mixing more than two typefaces. Each additional font adds cognitive load. If using two, make them distinctly different so the hierarchy is obvious.
Colour Contrast for Visibility
High-contrast pairings work well: black on white (21:1 ratio), navy on white (12:1), red on white (8:1). Target a minimum 7:1 for easy readability. Medium contrast, like grey on beige (4:1), often performs poorly in real lighting conditions.
If the brand palette doesn’t provide sufficient contrast (common with pastels), use brand colours as accents while employing high-contrast colours for primary messages. Example: sage green and cream creates a 2.8:1 ratio (unreadable beyond 8-10 feet). Solution: sage as accent, charcoal grey for headlines on cream (8.3:1 ratio, highly readable).
Common mistakes: never use complementary colours at similar values (blur together at distance), never red on green (8% of males can’t distinguish), never assume monitor matches printer output (RGB versus CMYK shifts colours).
The Three-Second Communication Rule
Effective banners communicate core message quickly: who you are (company name, 48-72 point minimum), what you do (3-7 words, 72-120 point headlines), why it matters (single benefit, 36-60 point supporting text).
Optimal text coverage is 15-25% of the total surface. Text above 35-40% creates an overwhelming appearance. In our experience, cleaner designs with appropriate text density often generate better engagement, though results vary.
Most banners benefit from removing roughly 40% of text without losing core message effectiveness. Every word removed makes the remaining words more prominent by eliminating visual competition.
Example (one client case, not typical): Banner redesign reduced 22 elements to 4 core elements. Original included company name, product name, seven features, three testimonials, two CTAs, website, phone, social media, QR code, booth number, tagline, and founders’ photo. Redesigned version: headline with value proposition, explanatory sub-headline, customer logos, clear CTA with booth number. Engagement improved significantly, though individual results vary widely.
Avoiding Common Design Mistakes
Understanding what doesn’t work helps avoid wasted investment.
Cluttered Layouts
When designers include numerous features, multiple CTAs, company history, and various graphics, viewers may find the content overwhelming. Cleaner designs with focused messages often perform better.
Information overload: twelve bullet points when viewers read perhaps 2-3 maximum, five font sizes and four families creating confusion, three CTAs creating decision paralysis.
Generic Stock Photography
Commonly used stock images (like generic business meetings) are often recognisable as stock. Viewers may unconsciously judge this as generic marketing, potentially undermining credibility.
Better alternatives: specific product photography, data visualisation, brand-focused graphics, custom photography (typically $800-1500 for product session, $1200-2500 for lifestyle), or simply white space with strong typography.
Weak Calls-to-Action
“Visit booth 237 for a free sample” provides a specific location and benefit. “Scan QR code for instant demo” provides a specific action and result. These specific CTAs often outperform vague ones like “Learn more,” though effectiveness varies by audience.
Material Mismatches
Using standard mechanisms for frequent transport may lead to premature replacement versus heavy-duty designs for intensive use. Or purchasing weather-resistant materials for indoor-only applications means paying for unused features (poly film costs 30-40% more than vinyl).
Inverse applies: using indoor vinyl outdoors may lead to faster degradation. After 8-12 outdoor events, vinyl might need replacement, whereas weather-resistant materials would last 40-50 outdoor events.
Strategic Placement and Setup
Placement affects performance more than most realise. Your retractable banners work in concert with every other booth element. Flooring, lighting, and furniture all coordinate to create cohesive visitor experiences that determine whether prospects stop or keep walking.
Reading Traffic Patterns
Based on trade show observations, people often turn right initially (right-hand dominance), favour perimeter walkways before exploring centre aisles (roughly 60% hug perimeter first), and pause at corners where sight lines change (corners often see 40-50% more traffic than mid-aisle, though this varies).
Understanding these behavioural patterns helps you position banners where they’ll have maximum impact. Consider which direction visitors approach from, what catches their eye, and what makes them pause versus continue walking.
Position banners where people naturally pause or look, not in straight walkways where they’re focused on destinations. The primary banner in the front-left corner may capture higher engagement. Secondary banner front-right may capture additional engagement from left-side approachers.
Example: A 10×10 booth in a hall corner may receive approximately 1,400 passes daily at moderate shows. Smart exhibitors leverage this traffic by ensuring every booth element, from banners to flooring to lighting, works together to capture and hold visitor attention. The same booth mid-aisle may receive approximately 900 passes. That’s roughly 56% more traffic from position alone, though numbers vary significantly.
Setup Process
Assembly typically takes 90-120 seconds once practised (first-time takes 3-4 minutes): Remove stand from case, place base on floor, extend poles fully before attaching graphic (don’t stress the mechanism), hook graphic to top pole ensuring full seat, pull banner up smoothly, adjust tension until taut but not overstressed.
Lighting Considerations
Natural light behaves differently throughout the day. Morning light often has a blue cast, and afternoon light has a warmer golden cast. Intensity and angle vary. Windows on east walls may create morning glare, and west walls may create afternoon glare. Position banners facing away from direct windows when feasible, or use matte materials if glare is unavoidable.
Supplemental lighting doesn’t need to be expensive. LED shop lights from hardware stores (often $30-50) positioned to graze surfaces from 45-degree angles can create noticeable visibility improvement. These typically output 3000-4000 lumens with adjustable brightness.
Maintenance and Storage Best Practices
Cleaning Methods
Vinyl: Use a damp cloth with mild detergent (1 tablespoon dish soap in 2 cups water). For stubborn stains, 70% isopropyl alcohol on a cotton swab. Products to avoid: ammonia-based cleaners, abrasives, petroleum-based cleaners, acetone, and bleach.
Fabric: Spot cleaning only with 70% isopropyl alcohol on swabs. Blot gently, don’t rub. Avoid soaking the entire banner. For large stains, professional cleaning (often $45-65) may be worthwhile versus risking DIY damage.
Storage Conditions
Aim for moderate temperatures (50-80°F) with moderate humidity (30-50%). This maintains material integrity while avoiding mould (requires 60%+ humidity) or excessive drying (below 20%).
Less ideal: attics (40-120°F seasonal swings), garages (temperature swings plus exhaust), basements (often 60-80% humidity). Better: interior closets, spare rooms, climate-controlled facilities if needed (often $45-85 monthly for small units).
Common Adjustments
Tension adjustment: Many mechanisms include small dials on top pole assemblies. Turn clockwise incrementally (1/4 turn) to increase spring pressure, checking results between adjustments. Stop when taut without stress lines.
Alignment: Crooked hanging often indicates an uneven floor. Thin shims under the base (typically $3-5 per pack) can help level. A quarter-inch shim often corrects a 2-3 degree lean.
Emergency repairs: Small tears get clear tape on the back side. Complete mechanism failure might require alternative hanging (binder clips, zip ties, adhesive strips) as a temporary solution.
Keep emergency kit: clear tape ($4), duct tape ($6), binder clips ($8), zip ties ($5). A total of roughly $26 can potentially save display during failures.
Budget Planning and Total Cost
Understanding the total cost of ownership helps make better decisions.
Cost Ranges by Quality
Basic stands: Often $150-250 for standard mechanisms and vinyl graphics. May work for infrequent use. Available through various suppliers.
Mid-range: Often $300-450 for better mechanisms, improved printing, and material choices. Available from specialised manufacturers and regional suppliers.
Premium: Often $500-800+ for heavy-duty mechanisms, premium materials, better cases. Backlit options typically add $180-280+.
Pricing Disclaimer: All pricing represents approximate 2025 North American ranges and varies significantly by supplier, quantity, customisation, materials, and region. Always verify current pricing.
Volume Purchasing
Unit costs typically decrease with quantity. Purchasing 10-20 units together might provide 20-35% savings compared to individual purchases, but verify with your supplier. For multi-location businesses, coordinated purchasing might provide both cost savings and brand consistency.
Replacement Graphics
Mechanisms outlast graphics. Vinyl may show fading after 60-80 setups (perhaps 3-4 years for quarterly exhibitors or 14-18 months for monthly exhibitors, though results vary widely). Replacement costs typically run $120-240, depending on material; verify current pricing.
Replacement pricing: often $120-180 for vinyl in standard sizes, $140-200 for poly film, $180-240 for fabric. Typical turnaround is 3-5 business days.
Professional Design Investment
Professional design often costs $300-600, depending on scope, assuming existing brand materials. Typical scope: consultation, 2-3 concepts, revisions, production files. Turnaround typically 5-7 business days.
DIY alternatives: software subscriptions (roughly $15-55 monthly), time investment (often 15-25 hours for newcomers). For critical displays, professional design may provide better results.
We’ve observed that professionally designed banners often generate significantly better engagement compared to DIY banners with cluttered layouts and poor contrast. Difference frequently comes from understanding visual hierarchy, appropriate sizing, and effective white space use.
Disclaimer: Cost comparisons are examples for illustration only and should not be interpreted as guaranteed results. Actual costs, savings, and results vary significantly. Individual results vary significantly.
Making Your Decision
Match material to actual environment (vinyl for indoor, poly film for weather, fabric for travel or premium appearance). Choose mechanisms appropriate for realistic usage frequency. Design for quick comprehension from typical distances with strong contrast and focused messages.
A common mistake: purchasing budget options requiring premature replacement rather than appropriate-quality options lasting longer. Mid-range quality (often $300-450, verify current pricing) often provides good value.
Measure booth space to understand size constraints (takes 3 minutes). Estimate realistic setup cycles annually to inform mechanism selection (be honest about usage). Evaluate current designs objectively against the three-second test from 15-20 feet. Consult manufacturers who actually produce displays rather than just resellers.
Pop49’s been creating displays for major brands like Pepsi and IKEA for over 30 years. Not because we’re cheapest, but because we understand experiential marketing beyond “make a banner.”
When you’re ready for retractable displays that deliver value over time rather than gathering dust, Pop49’s complete capabilities (from concept through support) provide the professional solutions your brand needs.
Disclaimer: This guide provides general information based on Pop49’s 30+ years of manufacturing experience. All information is subject to change and should be verified with current suppliers before making purchasing decisions.
Pricing represents approximate 2025 North American ranges and varies significantly by supplier, quantity, materials, customisation, and location. Individual costs will differ from the examples.
Performance estimates, lifespan projections, and durability claims are based on Pop49’s manufacturing data under normal conditions. Individual results vary significantly based on usage frequency, care practices, storage conditions, environmental factors, and product quality. No guarantees regarding specific performance, longevity, or results.
ROI calculations and savings projections are simplified examples for illustration only and should not be interpreted as guaranteed results or predictions. Your actual return varies significantly based on numerous factors, including display quality, design effectiveness, placement strategies, target audience, industry, show quality, and implementation practices.
Always verify current material specifications, printing capabilities, pricing, regulations, and product availability with manufacturers and suppliers before making purchasing decisions. Consult appropriate professionals for guidance specific to your situation.
More Articles
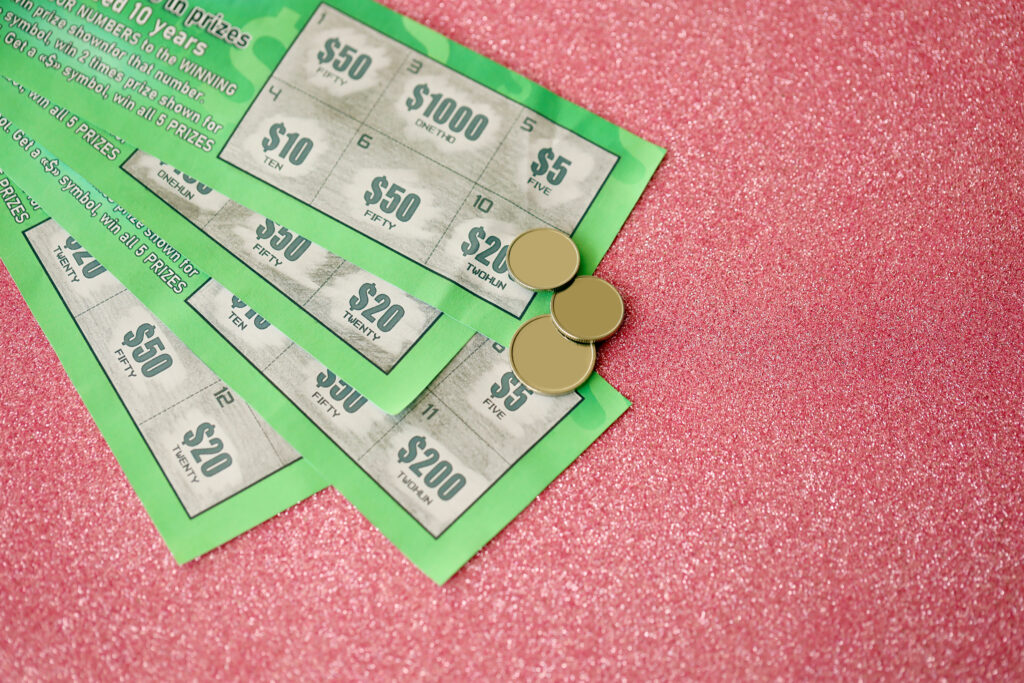
Top Incentives for Scratch and Win Promotions
Discover top scratch & win incentives: store gift cards, swag, coupons, getaway vacations, and more. Great for boosting engagement and…
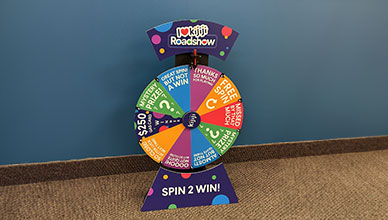
Elevate Your Brand’s Impact with Pop49: Introducing our Custom Spin Wheel Game
In the bustling world of marketing and brand engagement, standing out is not just an option, it’s a necessity. At…
Prize Wheel vs Digital Scratch and Win
Compare digital scratch cards and prize wheels. Discover which tool boosts engagement better and how to control prize odds with…